


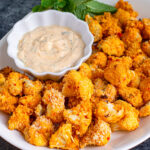


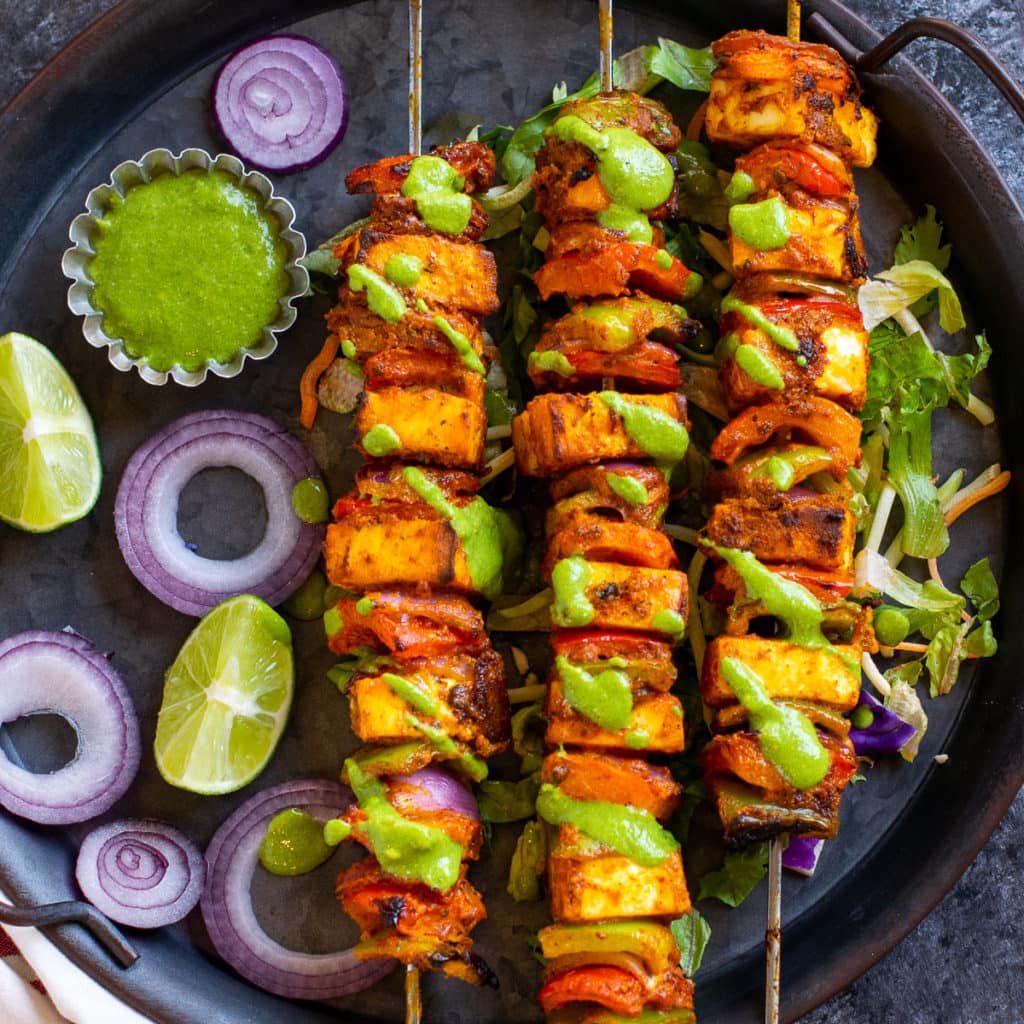
Paneer Tikka Skewers is a popular North Indian appetizer made with thick yogurt and spice marinade. Learn how to make this restaurant-style starter at home without a tandoor using an oven or a pan. Video recipe!
What is Paneer Tikka?
Paneer tikka or paneer shashlik is the vegetarian version of the famous chicken tikka. Tikka is the tangy spicy yogurt marinade in which you toss the paneer. Shashlik is the actual skewered dish in which the paneer is arranged. It is also known as paneer kabab or malai paneer tikka. It is a dry appetizer and not to be confused with paneer tikka masala curry. This appetizer is vegetarian, gluten-free and a healthy protein meal option.
Table of contents
- What is Paneer Tikka?
- Ingredients to make Tandoori Paneer Tikka
- Easy 3 Step process
- Best way to serve Paneer Skewers
- Closest possible substitutes
- Expert tips to consider
- Frequently Asked Questions.
- Paneer tikka on the tawa or a skillet
- Recommended paneer to use for skewers.
- Upgrade this side dish to the main course in 4 easy ways –
- Easy Indian appetizers to try –
- Tandoori Paneer Tikka Recipe
Ingredients to make Tandoori Paneer Tikka
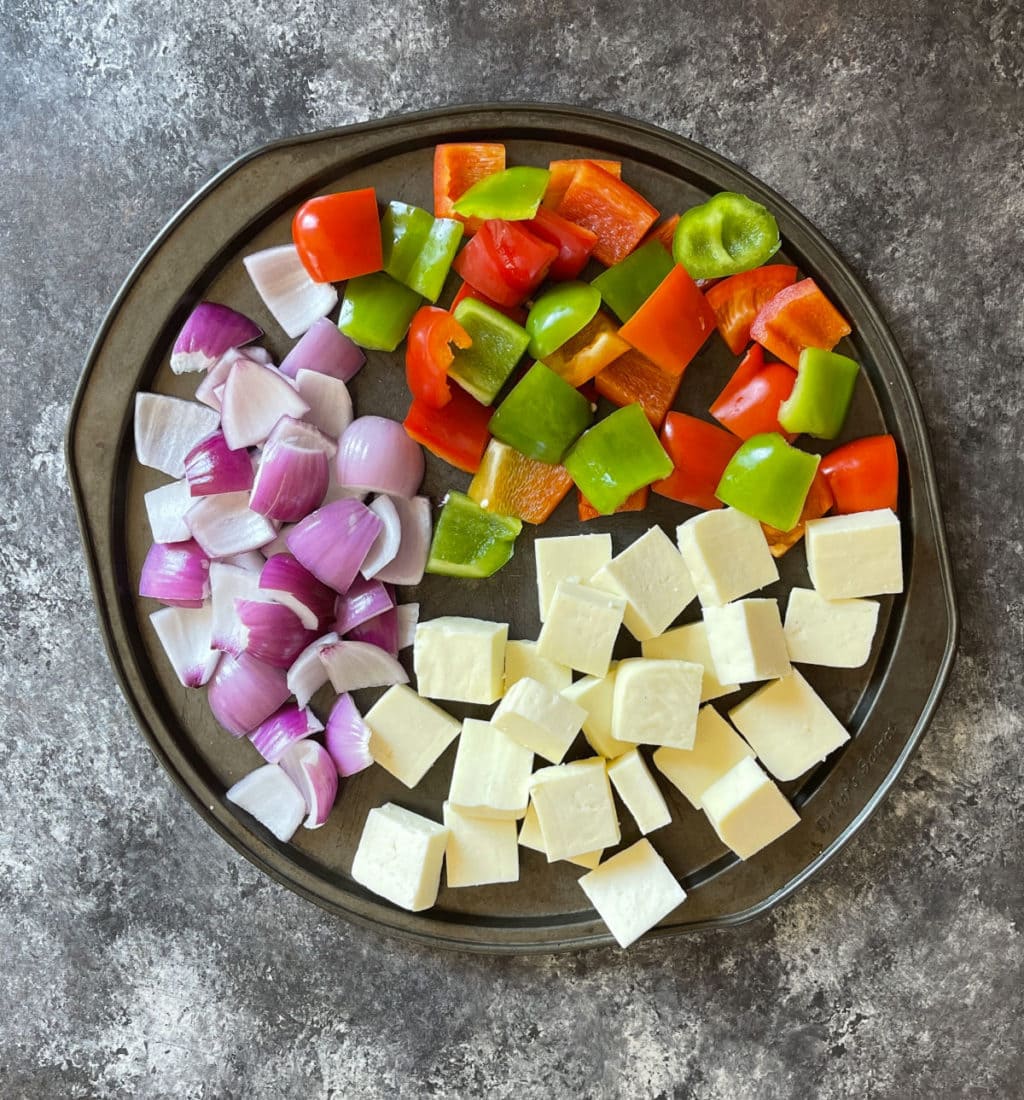
I am using firm paneer, colorful peppers and red onions to make today’s recipe. I have cut them into approx. 1.5 “ squares so that they slide easily in the skewers without breaking.
Paneer Tikka Marinade
Yogurt
- I have use store-bought full fat yogurt. You can use Greek or homemade yogurt too. Just make sure it is very thick.
- You can place the curd in a muslin cloth and wrap it. Put it on a strainer. Add a heavy weight on the cloth and let excess water drip for 2-3 hours to form hung curd. (optional step)
- Thick curd is needed for the masala to coat well on the paneer and not drip away.
Spices
- I have used basic Indian spices like red chili powder, turmeric, coriander, cumin, chaat and garam masala. I have not used any food color as the restaurants do. Use Kashmiri chili powder for the bright red color.
- Kasoori methi adds an earthy touch to this recipe.
- Ginger and garlic provides abundance of flavor that can never go wrong.
Roasted besan or Chickpea flour
- Roasted besan is very critical to this recipe because it helps the yogurt and masala to stick well on the prepared paneer tikkas.
- I roast a big batch of besan in a pan on a low flame until it turns light brown and has a nutty aroma. Then I let it col and store in an airtight container in my pantry. Use as needed.
Choice of oil is important.
- Mustard oil is the secret to exact restaurant-style taste of the tikkas. It is really a game changer.
- If you do not have it then use normal cooking oil.
Cream or Malai
Restaurants use a dash of cream to make this appetizer rich. You may swap it with more yogurt.
Lemon juice
I have used the necessary tang. It will brighten up the kebabs with striking flavor.
Easy 3 Step process
- Prepare the ingredients
- Roast besan until light brown, keep aside.
- Cut peppers, onions and paneer into approx. 1” – 1.5” cubes. The thickness of paneer should be at least ½”
- Warm up mustard oil until hot and switch off the flame.Let it cool down.
- Then add in the cream and lemon juice to it and keep aside.
2. Make the marinade
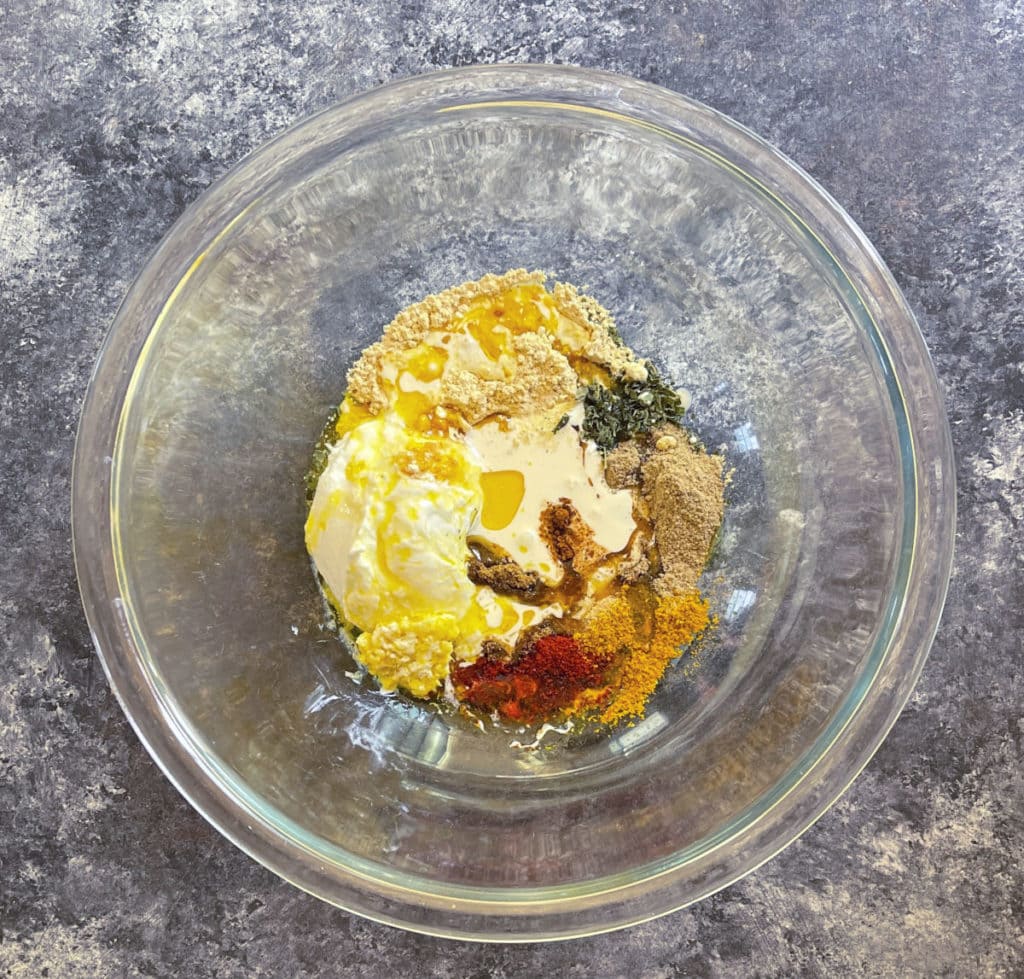
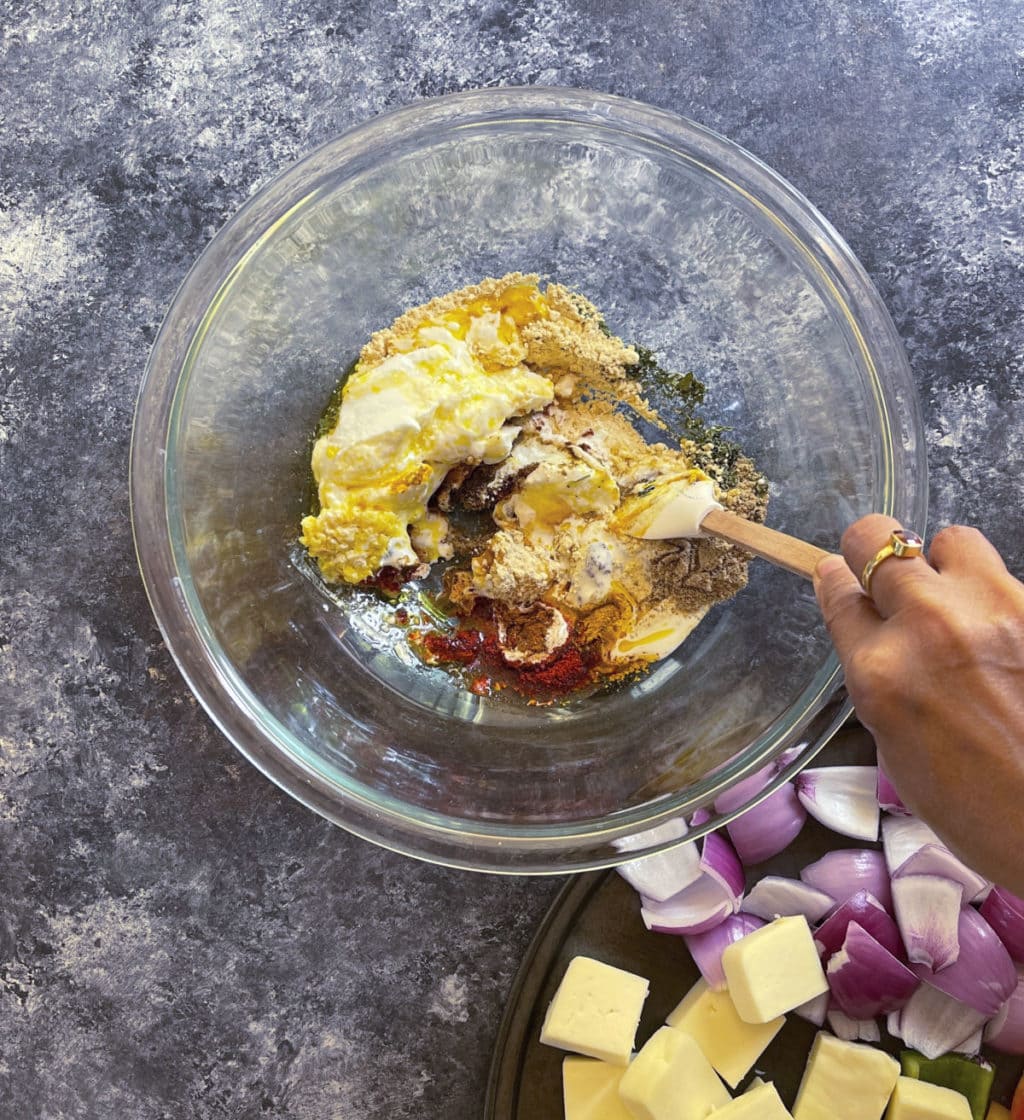
- Add everything called for the marinade in a big bowl.
- Add in the oil cream mixture and whisk everything well.
- Taste the marinade. It should be concentrated and a bit high on spices and salt as it will balance out once it gets coated.
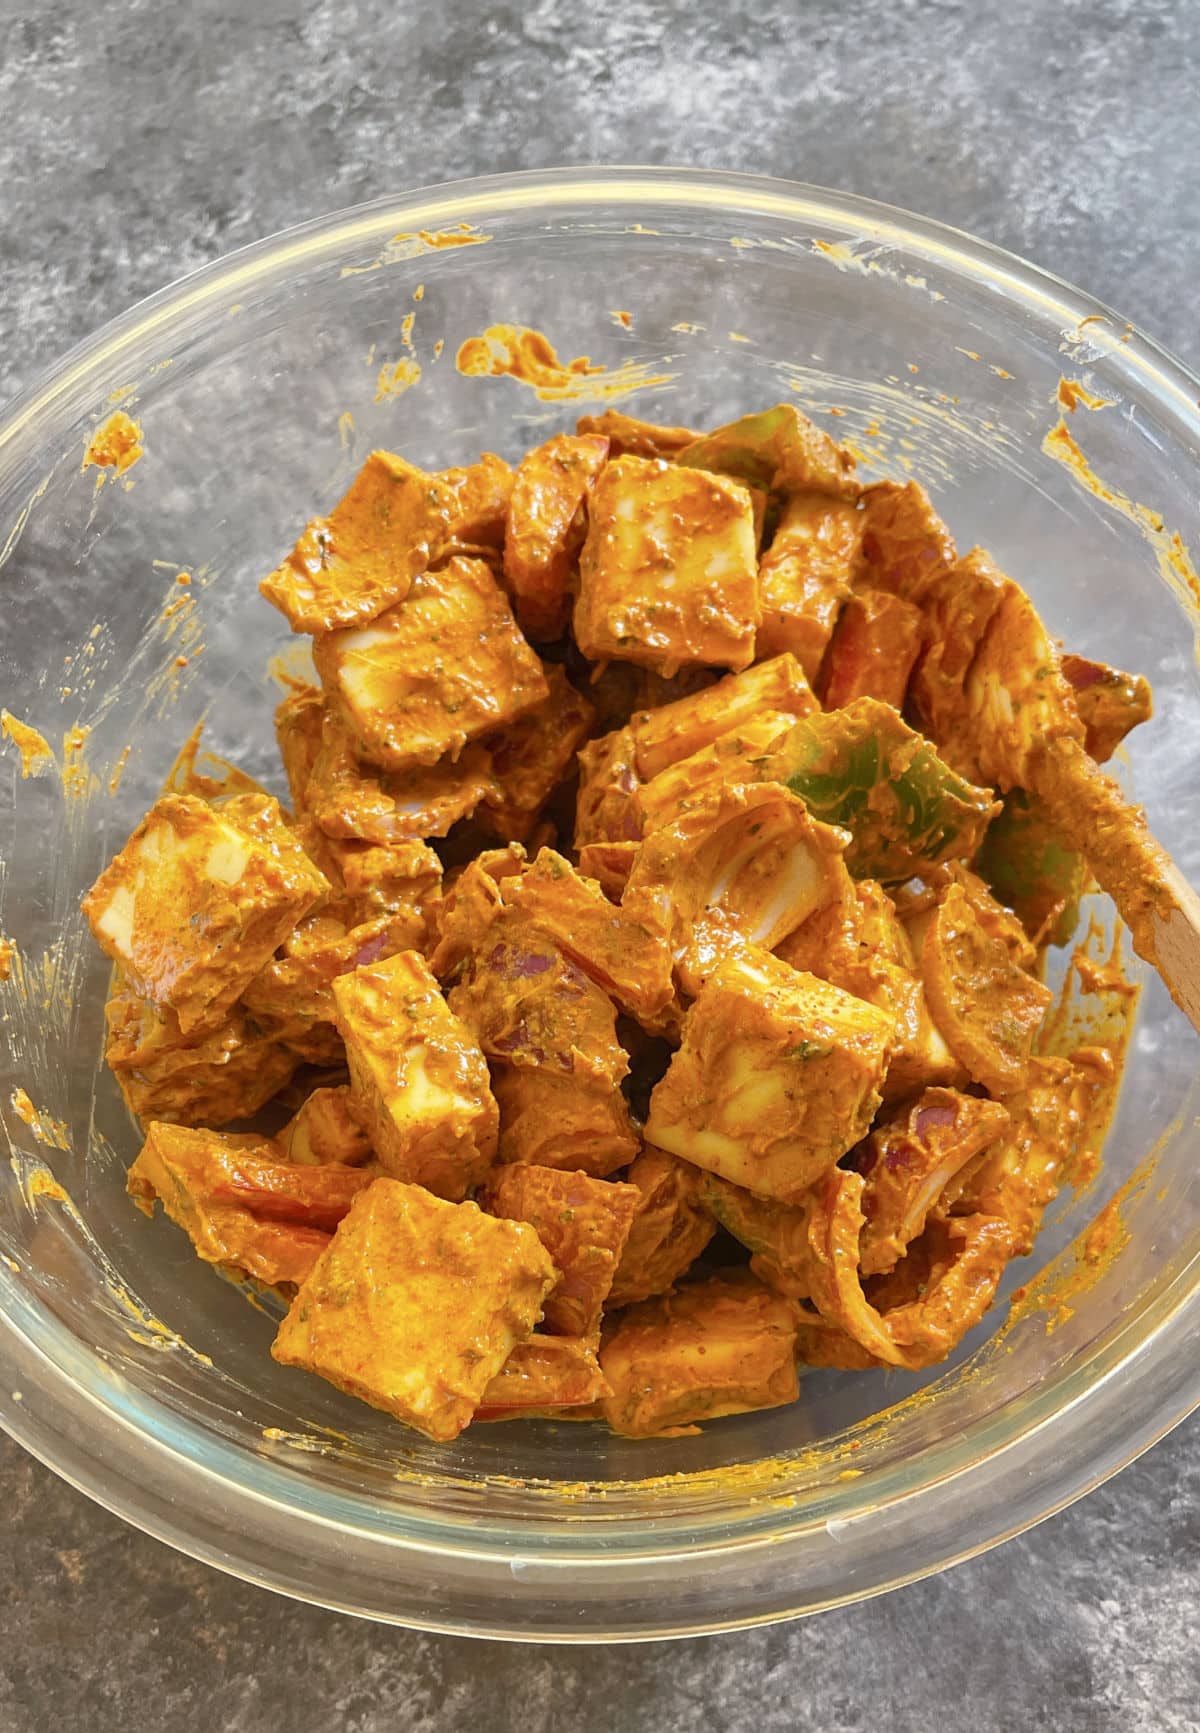
- Now add in the cubed peppers, onions and paneer.
- Mix everything well with your hands or a spoon.
- Make sure everything is coated well with the mixture
- .Make sure to be gentle, to avoid the paneer to break.
- Let the marinade sit covered in the fridge for at least 2 hours or up to 2 days for the flavors to meddle.
3. Bake and broil paneer skewers in the oven.
- Pre heat the oven to 480 degrees F. Keep the oven setting close to the maximum temperature.
- Place a foil on a baking tray and grease it with oil.
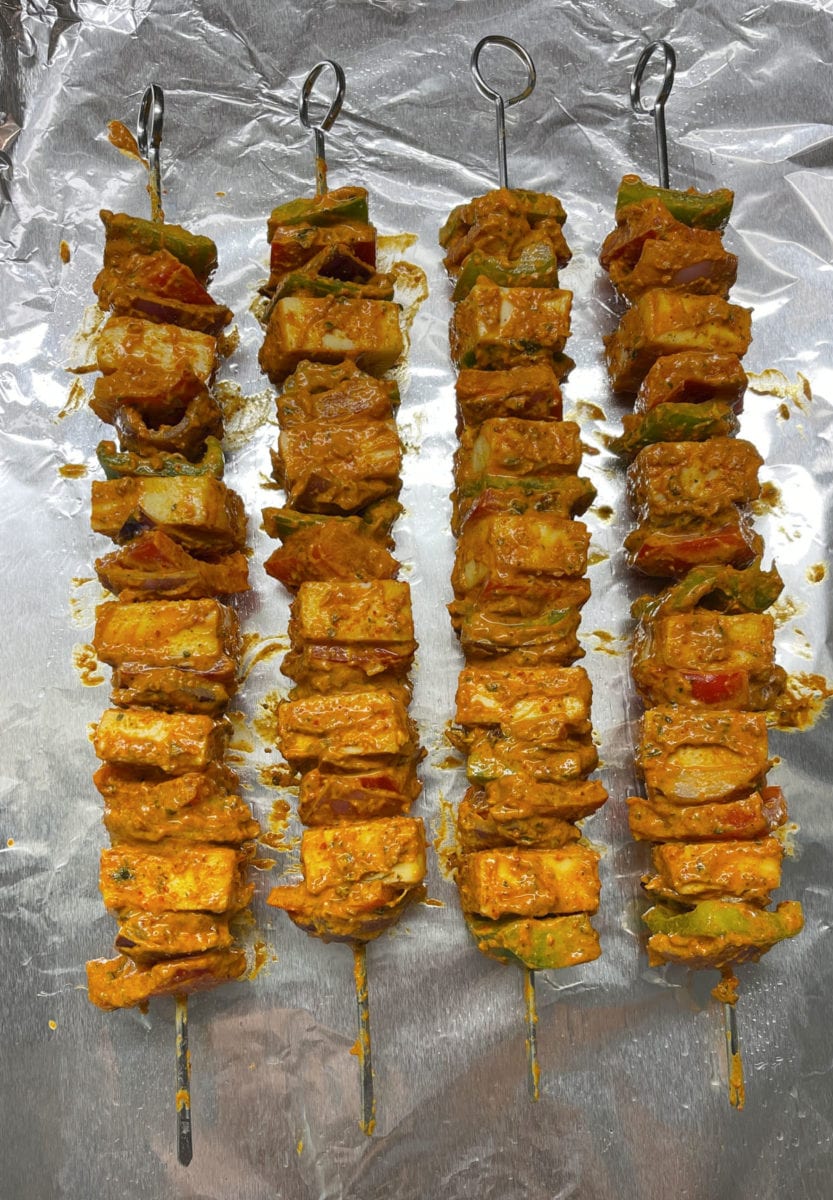
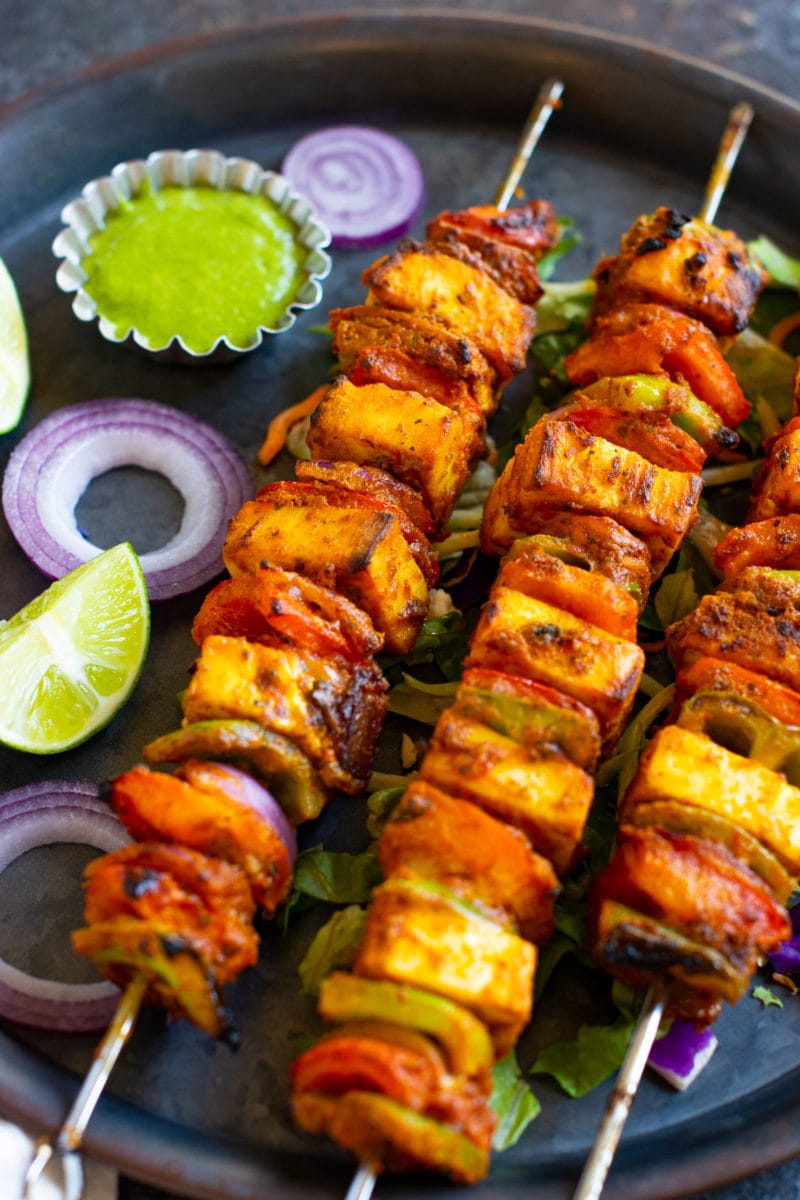
- Now arrange the paneer and veggies on the skewers by alternating them.
- You can do 2 onion petals, followed by 2 peppers, and then one paneer cube.
- Arrange all the skewers. Brush them with some melted butter or oil so that they remain moist even after baking.
- Bake them on the pan for about 4-minute and then turn once.
- Bake again for 4-5 minutes.
- Now switch on the broil to high i.e the upper heating element of the oven.
- Place the tikka-filled tray on the topmost rack to get them a bit charred exactly like the tandoor one.
- Let it cook for 1-2 minutes. Please keep an eye as they will start getting crisp around 45-second mark in small ovens.
- No need to turn it, you may do it if you want it charred on all sides.
- Once you are happy with how they look, carefully pull the tray out.
- The skewers will be very hot, so use a kitchen cloth to hold the end of the skewers.
- Next, gently slide the tikkas onto a plate by sliding it a knife as shown in the video.
- Taste one, and if you feel it needs more salt or lemon then now is the time to sprinkle some on the top and serve immediately.
- Serve it with this yogurt cilantro chutney on the side.
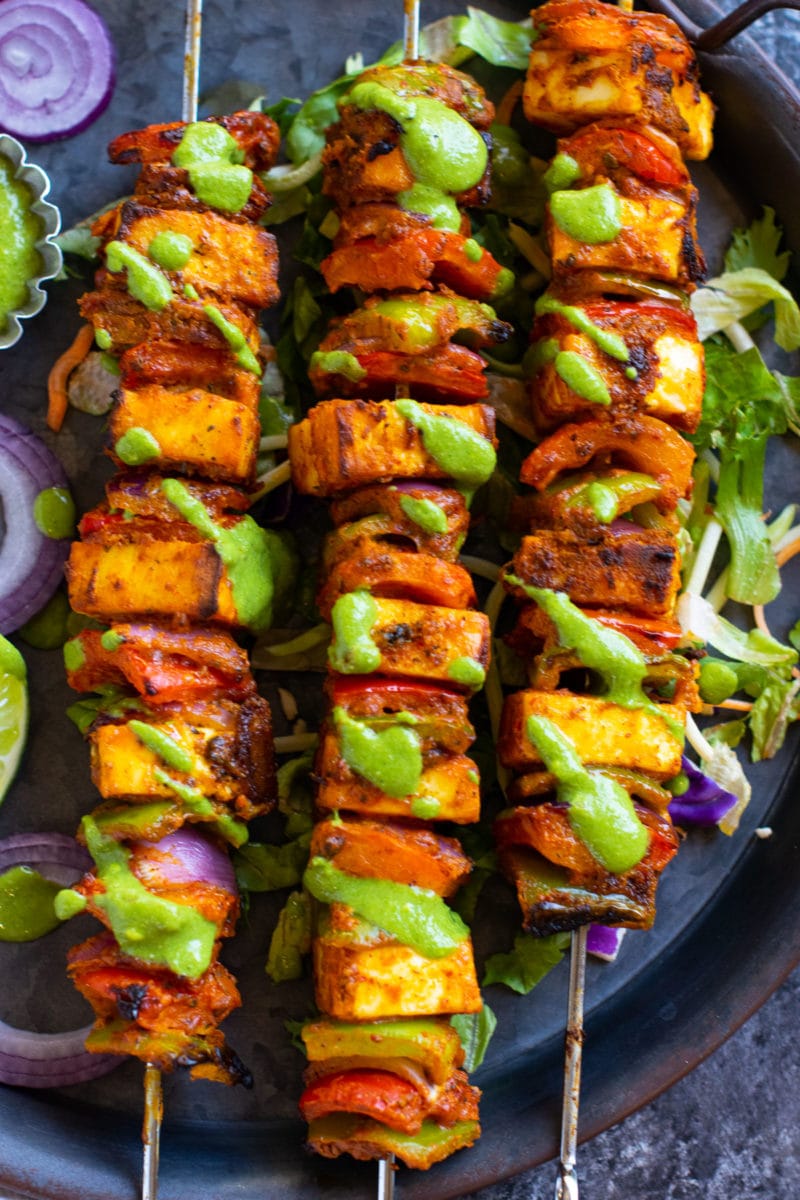
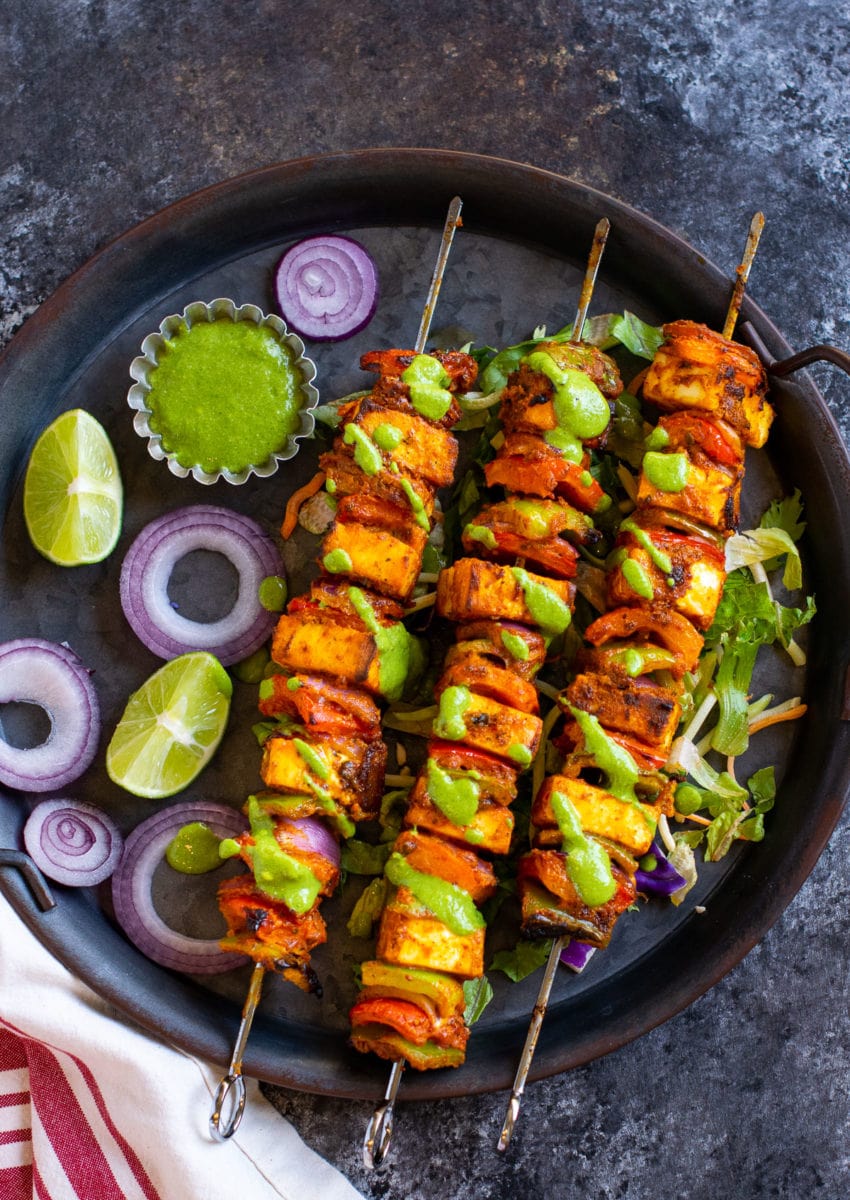
Best way to serve Paneer Skewers
I like to eat it with a side of green chutney mixed with a little yogurt, lemon wedges and some mixed salad on the side.
Closest possible substitutes
- Swap the spices called for marination with 2 tablespoons readymade tandoori masala. Adjust salt and lemon to taste.
- Substitute green bell peppers with any other color you want.
- Swap mustard oil for cooking oil of choice.
- Use 1 tablespoon extra yogurt instead of cream.
Expert tips to consider
- Use firmer paneer to avoid breakage. I recommend Nanak, Gopi or Verka in the USA.
- Marinate the paneer at least for 2 hours for it to soak the masalas.
- Use store-bought yogurt or homemade hung curd (i.e most of the liquid drained) for the best results.
- Do not bake the skewers for more than 10 minutes. Longer baking can turn them dry, chewy, and rubbery.
- Keep an eye on the tray while broiling as it can burn quickly.
Frequently Asked Questions.
How to make paneer tikka without skewers?
No skewers, no problem. Simply lay down the peppers, onions, and paneer in a single layer on a lined and greased baking sheet. Bake it for 10 minutes, gently flipping once in between. Broil it until a bit charred over the top.
Should I use metal or wooden skewers?
- Wooden skewers require pre-planning. You will have to soak it in water for at least an hour before you use them. They easily tend to get burnt in the oven at high temperatures. They are good for just one-time use and you have to throw them after making the tikkas.
- So I prefer metal skewers because they are easy to use, cleans up well, and are reusable. These are indeed a good investment.
How to avoid paneer from turning chewy and dry?
The common reason for paneer skewers to be dry is over baking. You just have to bake for 10 minutes, turning it midway on a very high oven temperature. For the charred look, broiling is necessary.
Paneer tikka on the tawa or a skillet
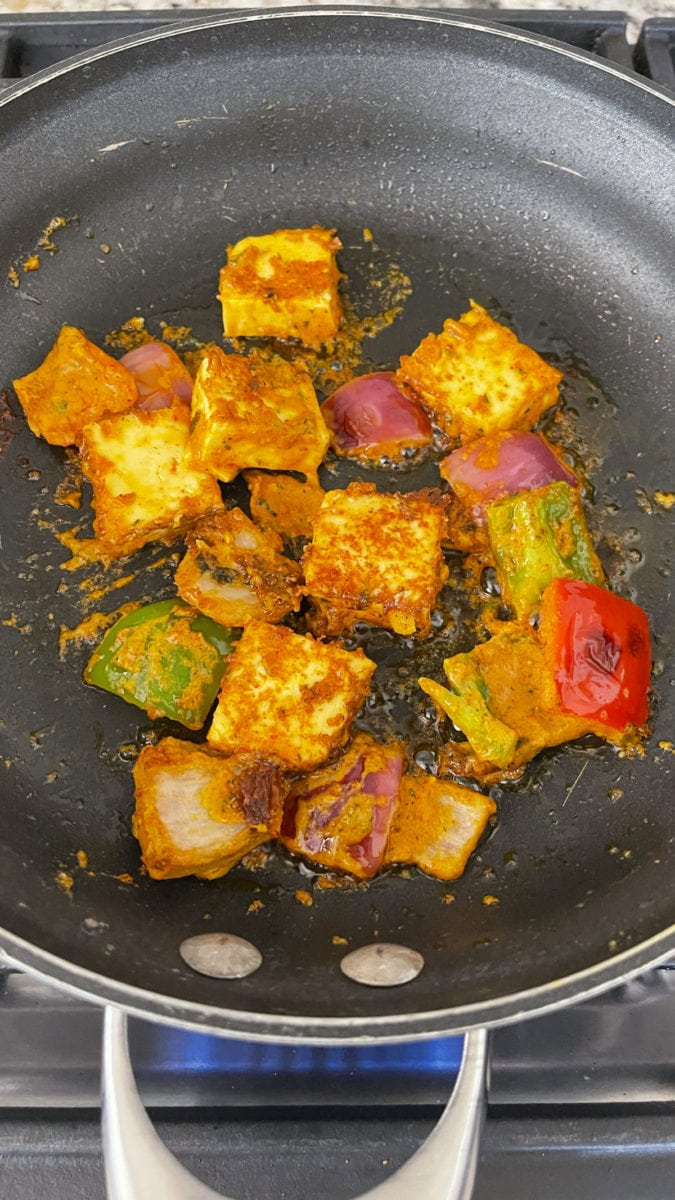
If you do not have an oven or are too intimidated to use it, simply make this starter on a Tawa, pan, or skillet. You can do it in 2 ways-
With skewers – Switch on the gas on high and grease the tawa liberally with oil. Once warm, place the skewers on it and do not move for a minute. Now turn the skewers carefully and cook on another side. Cook until all sides are a bit charred and crisp.
Without skewers– Simple grease the Tawa generously with oil. Keep it on high heat. Lay down the marinated veggies and paneer in a single layer. Cook for 2 minutes on really high flame and then flip them to cook the other side until golden brown.
Recommended paneer to use for skewers.
Do not use a very soft paneer to make this appetizer or else the paneer will tend to break while putting it in the skewers. If you reside in the United States, I recommend you to use Nanak, Gopi, or Verka paneer. These are firmer ones that work great for kababs.
Alternative to the spice list.
I know it’s a long list of Indian spices here added to make the marinade. If you are not of Indian origin or if you do not have access to these spices you can improvise by using store-bought tandoori masala. It is readily available in the Indian stores in the spices aisle. Use 2 tablespoons masala for this recipe. Taste the marinade and add more if needed.
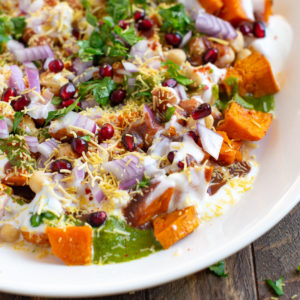
Upgrade this side dish to the main course in 4 easy ways –
Tandoori Paneer tikka wrap.
The easiest way to make it a fuller meal is by adding the baked paneer and veggies to a paratha or a tortilla. Slather it with some chutney and some cabbage or lettuce. Wrap it up and enjoy!
Turn it into a pizza.
Add the marinated paneer to your pizza base and make some delicious desi tandoori pizza.
Paneer tikka masala.
Top your tikka masala sauce with this paneer kabab and serve it hot with roti or rice.
Efficient workflow to make this recipe ahead of time.
- You can chop the veggies and paneer up to 3 days in advance and store it in the fridge.
- Yogurt and spice marinade can be made up to 2 days in advance.
- The veggies and paneer can be marinated and stored covered in the fridge up to 2 days before baking.
- You can arrange everything in the skewers and keep them ready to go in the oven up to 2 days in advance.
Tips to make it for a crowd or catering.
- This Indian vegetarian appetizer is a hit at any party. So please consider making a big batch.
- Refer to the tips mentioned under efficient workflow. Use disposable aluminum baking trays with a lid for convenience.
- If you are unable to bake it during the party, then bake and broil it before the event. Just before serving it, warm the baking tray covered with foil for 5 minutes on 500 deg F. Serve immediately.
KEEP IN TOUCH – Are we friends yet? Let’s connect on Facebook| Instagram | Pinterest | Twitter. Never miss a recipe. Please subscribe to my blog. It is free! Check out easy recipe videos on my Youtube channel now! Pin this photo for future reference.

Easy Indian appetizers to try –
Tandoori Paneer Tikka Recipe

Paneer Tikka Appetizer (Oven & Tawa method)
Ingredients
- 450 grams paneer
- 2 medium-size red onions
- 1 large green bell pepper capsicum
For the marinade
- 2 tablespoons mustard oil
- 2 teaspoon garlic minced
- 2 teaspoon ginger grated
- 2½ tablespoons besan
- ⅓ cup yogurt
- 2 teaspoon chaat masala
- 1 teaspoon garam masala
- 2 teaspoon red chili powder ( I use Kashmiri)
- 1 teaspoon cumin powder jeera
- ¼ teaspoon turmeric Haldi
- 1 teaspoon coriander powder
- 1 teaspoon lemon juice
- 2 tablespoons cream optional see notes
- 1 teaspoon kasoori methi
- 1 teaspoon salt or to taste as chaat masala already has it.
Instructions
- Roast besan until light brown, keep aside.
- Cut peppers, onions, and paneer into approx. 1” – 1.5” cubes. The thickness of paneer should be at least ½”
- Warm-up mustard oil until hot and switch off the flame.
- Let it cool down.
- Then add in the cream and lemon juice to it and keep aside.
For marination
- Add everything called for the marinade in a big bowl.
- Add in the oil cream mixture and whisk everything well.
- Taste the marinade. It should be concentrated and a bit high on spices and salt as it will balance out once it gets coated.
- Now add in the cubed peppers, onions, and paneer.
- Mix everything well with your hands or a spoon. Make sure everything is coated well with the mixture.
- Make sure to be gentle, to avoid the paneer breaking.
- Let the marinade sit covered in the fridge for at least 2 hours or up to 2 days for the flavors to meddle.
Time to bake the tikkas
- If you are using wooden skewers, you will have to soak them completely submerged in water in a pan before baking for at least 1 hour. This will reduce any burning of the skewers.
- I like to use metal ones. No soaking is needed for them.
- Preheat the oven to 480 degrees F
- Place a foil on a baking tray and grease it with oil.
- Now arrange the paneer and veggies on the skewers by alternating them.
- You can do 2 onion petals, followed by 2 peppers, and then one paneer cube.
- Arrange all the skewers. Brush them with some melted butter or oil so that they remain moist even after baking.
- Bake them on the pan for about 4 minutes and then turn once.
- Bake again for 4-5 minutes.
- Now switch on the broil to high i.e the upper heating element of the oven.
- Place the skewers-filled tray on the topmost rack to get them a bit charred exactly like the tandoor one.
- Let it cook for 1-2 minutes. Please keep an eye as they will start getting crisp around the 30-second mark in small ovens.
- No need to turn it, you may do it if you want it charred on all sides.
- Once you are happy with how they look, carefully pull the tray out.
- The skewers will be very hot, so use a kitchen cloth to hold the end of the skewers.
- Next, gently slide the tikkas onto a plate by sliding it into a knife as shown in the video.
- Taste one, and if you feel it needs more salt or lemon then now is the time to sprinkle some on the top and serve immediately.
- Serve it with this yogurt cilantro chutney on the side.
Step by Step video of the recipe –
Notes
Closest possible substitutes
- Swap the masalas called for marination with 2 tablespoons readymade tandoori masala. Adjust salt and lemon to taste.
- Substitute green bell peppers with any other color you want.
- Swap mustard oil for cooking oil of choice.
- Use 1 tablespoon extra yogurt instead of cream.
Expert tips to consider
- Use firmer paneer to avoid breakage. I recommend Nanak, Gopi or Verka in the USA.
- Marinate the paneer at least for 2 hours for it to soak the masalas.
- Use store-bought yogurt or homemade hung curd (i.e most of the liquid drained) for the best results.
- Do not bake the skewers for more than 10 minutes. Longer baking can turn them dry, chewy, and rubbery.
- Keep an eye on the tray while broiling as it can burn quickly.
- You can chop the veggies and paneer up to 3 days in advance and store them in the fridge.
- Yogurt and spice marinade can be made up to 2 days in advance.
- The veggies and paneer can be marinated and stored covered in the fridge up to 2 days before baking.
- You can arrange everything in the skewers and keep them ready to go in the oven up to 2 days in advance.


Hi Khushboo, This one tastes amazing and super easy to cook. I followed it step by step and turned out just like how it should be. Have already tried this a few times and its always a hit. Thank you so much for your detailed recipe and steps ~~ Madhu
Thank you for the lovely feedback, Madhu.